
Appearance
Pages, SEO & privacy
Everything in this section lives under Blast Studio → Pages, SEO & privacy.
Error pages
Blast styles 404 (not found), 403 (forbidden), 419 (session expired), 429 (too many requests) and 500 (server error). Choose a design once and all of them stay consistent.
| Design | Character |
|---|---|
| Scene | The infrastructure scene with the error code integrated. The default |
| Links | Leads with helpful links back into your store |
| Oversized | A huge typographic error code as the artwork |
| Terminal | A command-line flavour with a typed message |
| Glitch | A subtle glitch effect on the code |
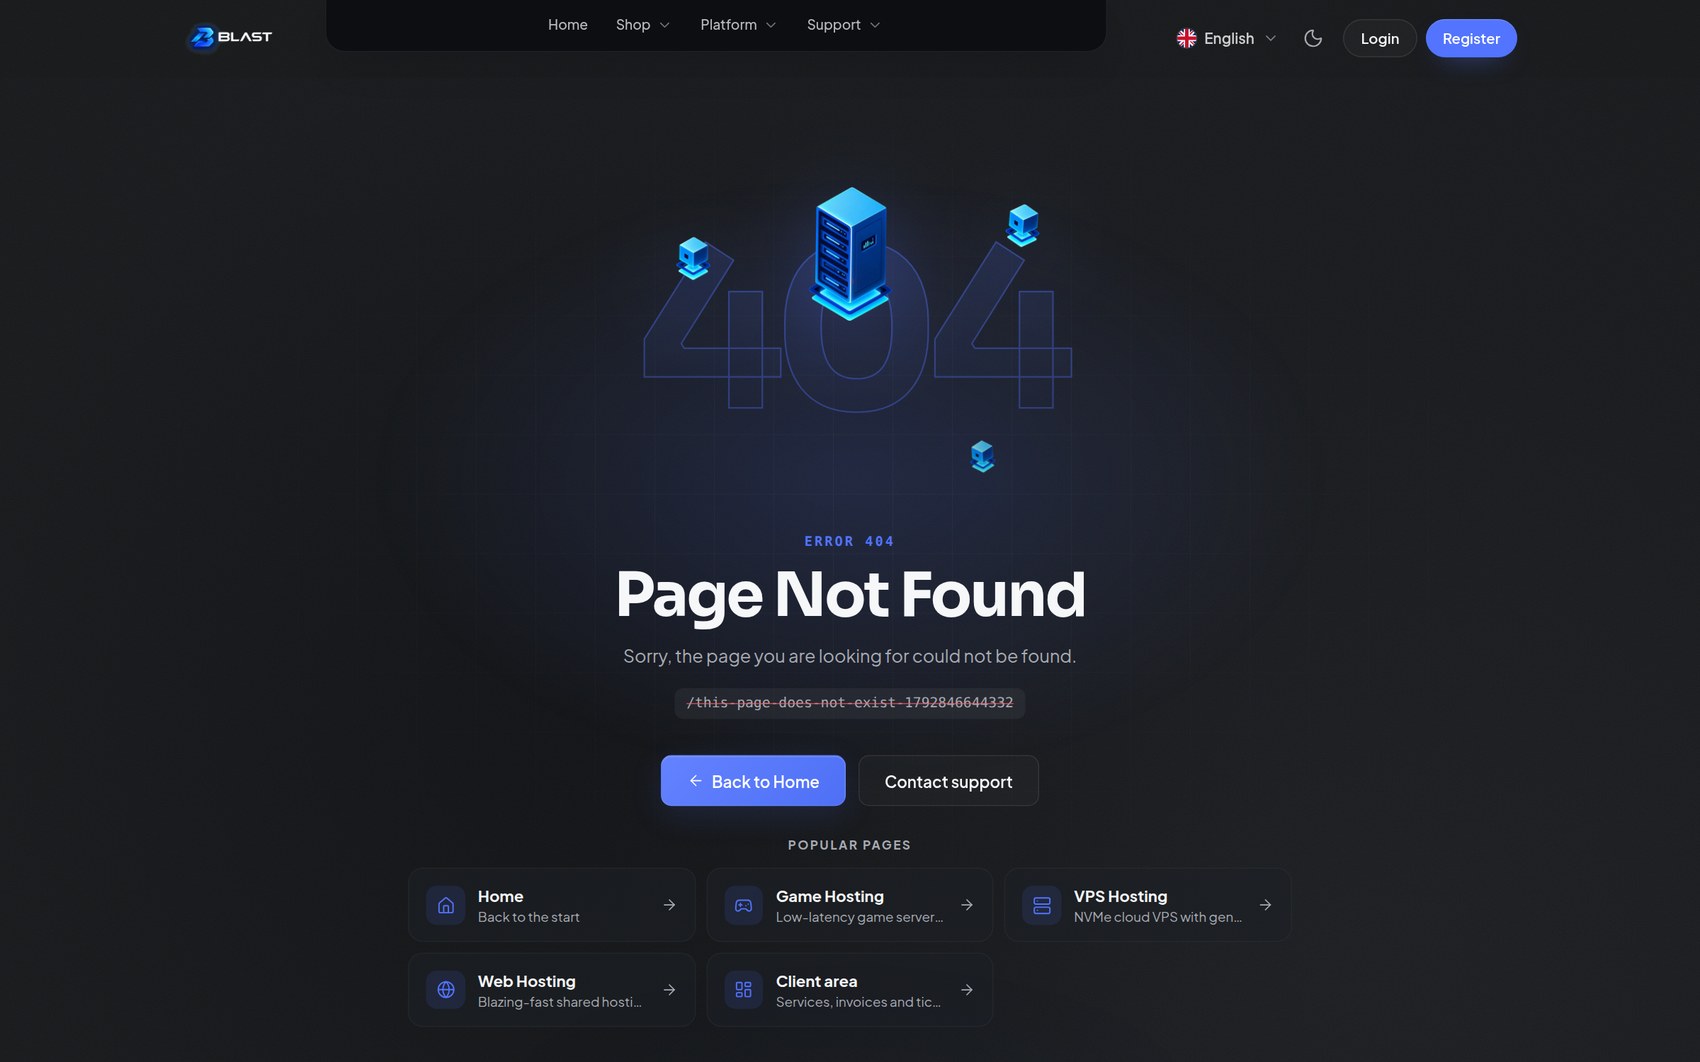
Per error type you can set:
- Title and message — write your own copy for each code, so a "not found" can point customers at your store instead of only apologising.
- Home button label and a second button with label and URL — for example a "Contact support" link to your tickets.
- Popular pages — quick links on the 404 page.
- "Did you mean …?" — for wrong URLs close to a real page, Blast suggests the correct one.
- Show requested address — display the URL the visitor tried.
Error pages use the full site chrome, so visitors who hit a dead end are always one click from somewhere useful.
Maintenance mode
Put the storefront into maintenance without touching your server. Under Pages, SEO & privacy → Maintenance mode:
| Setting | What it does |
|---|---|
| Maintenance mode | The master switch |
| Maintenance design | Scene, Minimal, Horizon or Countdown |
| Badge | A small label above the title, for example "Scheduled maintenance" |
| Title and message | Your own wording |
| Back online at | An estimated time, shown to visitors |
| Status button | An optional button to your status page |
| Allowed IPs | Visitors from these IPs skip maintenance — useful for checking the site mid-maintenance |
| Social links | Show your social icons on the page |
| Staff sign-in link | A discreet link to the login page for staff |
While maintenance is on, visitors get the maintenance page, but admins and allowed IPs browse normally. Payment webhooks, API endpoints and sign-in keep working, so payments and automations are not interrupted.
The Countdown design shows a live countdown when "Back online at" is set.
A reminder you cannot miss
While maintenance is on, staff see a small floating pill reminding them the shop is hidden from visitors — so nobody forgets to turn it off.
Cookie consent
Blast includes a built-in cookie banner, so you do not need a separate plugin. It lives under Pages, SEO & privacy → Cookie consent.
Set Cookie consent to On and choose a design.
| Design | Character |
|---|---|
| Floating card | A card in the corner. Unobtrusive and premium |
| Bottom bar | A full-width bar across the bottom |
| Compact toast | A small toast — the lightest touch |
| Dialog | A centred modal for a serious, explicit choice |
Position moves the card or toast between corners. All text is editable: title, description, button labels (Accept all, Reject all, Customize, Save choices), and an optional policy link.
Categories
Three consent categories can be enabled independently.
| Category | Default | Use it for |
|---|---|---|
| Analytics | On | Visit statistics and product analytics |
| Marketing | On | Ad pixels and campaign measurement |
| Preferences | Off | Remembering optional choices such as language or region |
Each category has a description shown in the Customize view.
Consent-gated scripts
For every enabled category you can paste scripts. These scripts only run after the visitor allows that category — that is the whole point of the banner. Scripts are held in inert templates and executed the moment consent is given, without a page reload.
Typical use: your analytics snippet into Analytics scripts, your ad pixel into Marketing scripts.
Do not paste tracking code anywhere else
If you add a tracking snippet to the theme's custom CSS or to a template, it runs before consent and defeats the banner. The category fields are the only safe place.
Visitor experience
- On the first visit the banner appears after a moment.
- The visitor accepts all, rejects all, or customises per category.
- The choice is remembered for 180 days per browser, and visitors are asked again if you bump the Consent version number — useful when your cookie policy changes.
- A "Cookie settings" link in the footer reopens the preferences at any time.
Good practice
- Only enable the categories you actually use. A short, honest banner converts better than a long one.
- Add your cookie policy URL so the policy link works.
- When you change what you collect, update the policy and increase the consent version so visitors are asked again.
Language and currency
Blast ships a language and currency switcher that works with Paymenter's own localisation — there is no duplicate translation system. Settings are under Pages, SEO & privacy → Language & currency switcher.
| Design | Character |
|---|---|
| Dropdown | A compact dropdown with the current language and currency |
| Compact | A tighter single-line variant |
| Globe | A globe icon with the menu |
| Pills | All languages visible as pills — good for two or three |
| Setting | What it does |
|---|---|
| Flags | Show country flags next to languages |
| Language label | Show native names ("Deutsch"), codes ("DE"), or both |
| Currency in the same menu | Combine language and currency in one menu, reading Paymenter's currencies |
| Placement | Header, footer, or both |
| Search box | A search field inside the menu for stores with many languages |
| Flag overrides | Map languages to flags, one per line as code:flag, for example en:gb |
| Menu heading | Rename the "Language" heading |
Available languages and currencies are whatever you configured in Paymenter — Blast keeps no list of its own. The visitor's choice is stored and applied immediately, without a re-login. Flags are bundled locally, so there are no external requests.
Two or three languages
Use Pills — it makes switching obvious and removes a click. With many languages, use the dropdown with the search box on.
To translate your own Studio text, see Translations.
SEO
Blast handles the technical basics. Everything is under Pages, SEO & privacy → SEO & social sharing.
Titles and descriptions
| Setting | What it does |
|---|---|
| Page title format | How titles are built. {page} is the page name, {site} your site name. Default {page} · {site} |
| Homepage title | A dedicated title for the homepage — often just your site name |
| Homepage description | The meta description for the homepage |
| Default description | Fallback description for pages that do not provide their own |
Category and product pages use their own real names and descriptions automatically — you do not have to write anything for them.
Social sharing
| Setting | What it does |
|---|---|
| Social share image | The image shown when a page is shared (Open Graph and Twitter cards) |
| X / Twitter handle | Adds a twitter:site attribution to shared links |
Without a share image, links still generate clean title and description cards.
Search visibility
| Setting | What it does |
|---|---|
| Hide private pages from search | Adds noindex to the cart, checkout, client area and auth pages — the recommended default |
| Hide whole site from search | Site-wide noindex. Use it while your store is in development |
| Canonical links | Adds canonical URLs to avoid duplicate-content problems |
| Structured data | Adds JSON-LD (organisation and product signals, plus the product FAQ) |
| Sitemap | Serves /sitemap.xml listing your homepage, visible categories, visible products and published custom pages |
Custom pages have their own SEO title, meta description, share image and a Hide from search engines switch — see Page builder.
Verification
If you use Google Search Console or Bing Webmaster Tools, paste your verification codes and Blast adds the meta tags.
A practical checklist
- Set the Homepage title and Homepage description.
- Upload a Social share image — around 1200×630 works best.
- Keep Hide private pages from search on.
- Keep Sitemap on and submit
/sitemap.xmlin Search Console. - While building, use Hide whole site from search — then turn it off when you go live.
- Use per-page overrides only where you actually need them.