
Appearance
Installation
Version 1.1.0 · Krapple Studios · for Pterodactyl Panel 2.0
This guide is for panel administrators. For the screens you and your staff will use, see Using Player Manager.
What you need
| Requirement | Notes |
|---|---|
| Pterodactyl Panel 2.0 (beta 2 or newer) | Version 1.x panels cannot run extensions. Check with Admin → About, or php artisan --version. |
| Extension SDK 2.0.0-beta.6 or newer | Ships with the panel. |
| PHP 8.3 or newer | Included in the official v2 panel image. |
| A Minecraft Java server, 1.13+ | Vanilla, Paper, Spigot, Purpur, Fabric, Forge or NeoForge. |
| Admin access | To install the extension and change its settings. |
| Panel cron | Optional but recommended. It runs the automatic RCON setup in the background. |
Is this server supported?
The tab appears only on servers the panel recognises as Minecraft — the egg has the eula feature, or the minecraft / minecraft-java tag. All stock Minecraft eggs qualify. A custom "generic Java" egg usually does not; tag it, or move the server to a stock egg, and the tab appears.
Install
From the admin area
- Sign in as an administrator.
- Go to Admin → Extensions.
- Choose Install and upload
krapple-player-manager-1.1.0.pteroext. - Confirm. The extension installs, publishes its assets and enables itself.
Open any Minecraft server. Player Manager is now in its navigation.

From the command line
Copy the package to the panel server, then from the panel directory:
sh
php artisan p:extension:install krapple-player-manager-1.1.0.pteroext --enableIf the panel runs in Docker, copy the file into the container first:
sh
docker cp krapple-player-manager-1.1.0.pteroext <panel-container>:/tmp/
docker exec -it <panel-container> php artisan p:extension:install /tmp/krapple-player-manager-1.1.0.pteroext --enable
A successful install ends with:
INFO Installed Player Manager (krapple-player-manager) v1.1.0 - enabled.The extension does not modify any panel core files.
After installing
1. Check the tab loads
Open a Minecraft server. You should see Player Manager in the navigation, and opening it should show four tiles and the player list.
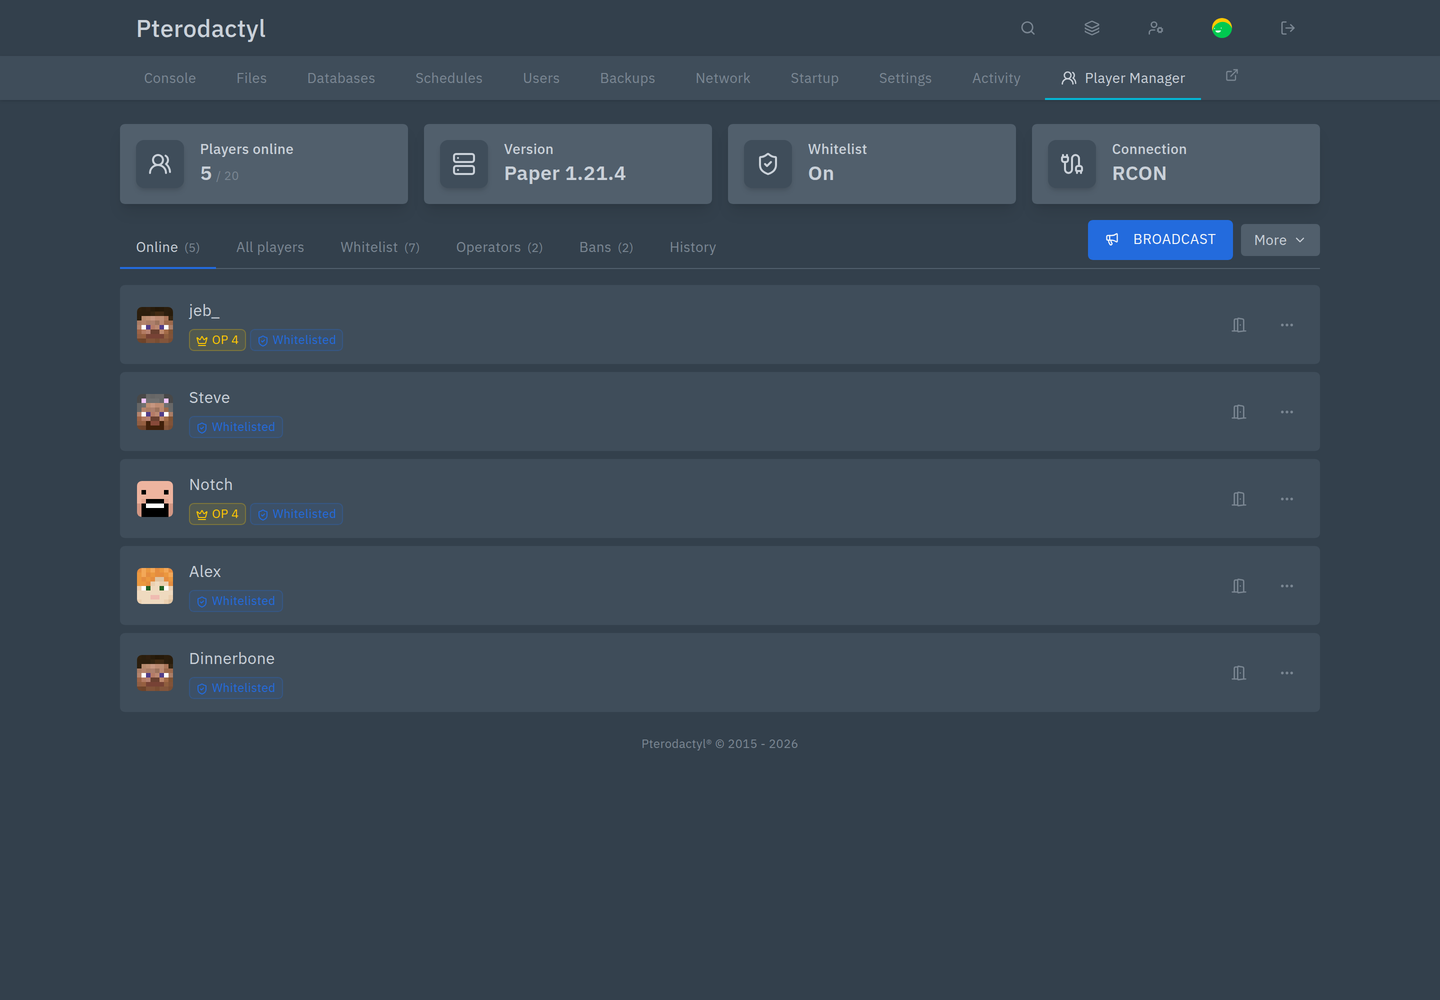
If the tab is missing, see Troubleshooting.
2. Let RCON set itself up
RCON gives live data and keeps the console clean. Player Manager sets it up for you:
- It writes
enable-rcon=true, a free port and a random password intoserver.properties. - It assigns that port to the server, so Docker opens it.
- It restarts the server once nobody is playing, because Minecraft reads that file only at startup.
- It stops the server echoing every RCON command into the console.
This runs from the panel's scheduler every five minutes, when the tab is opened, and after a server is installed or reinstalled.
To set up every server at once:
sh
php artisan krapple-player-manager:setup-rconAdd -v to see servers that were already configured, or pass a server's identifier to do just that one.
Large panels
If you would rather control when servers restart, turn off Restart empty servers to turn RCON on, run the command above, and restart servers yourself when convenient. RCON works from each server's next restart.
3. Confirm the connection
Open Player Manager → More → Connection settings. The banner at the top shows one of:
| Message | Meaning |
|---|---|
| RCON is on | Everything is live. Nothing else to do. |
| RCON is set up and turns on when the server restarts | Press Restart now, or let it restart when empty. |
| RCON is off | Press Set up RCON. |
The Connection tile on the main page shows RCON or Console, so you can tell at a glance.
4. Give your staff access
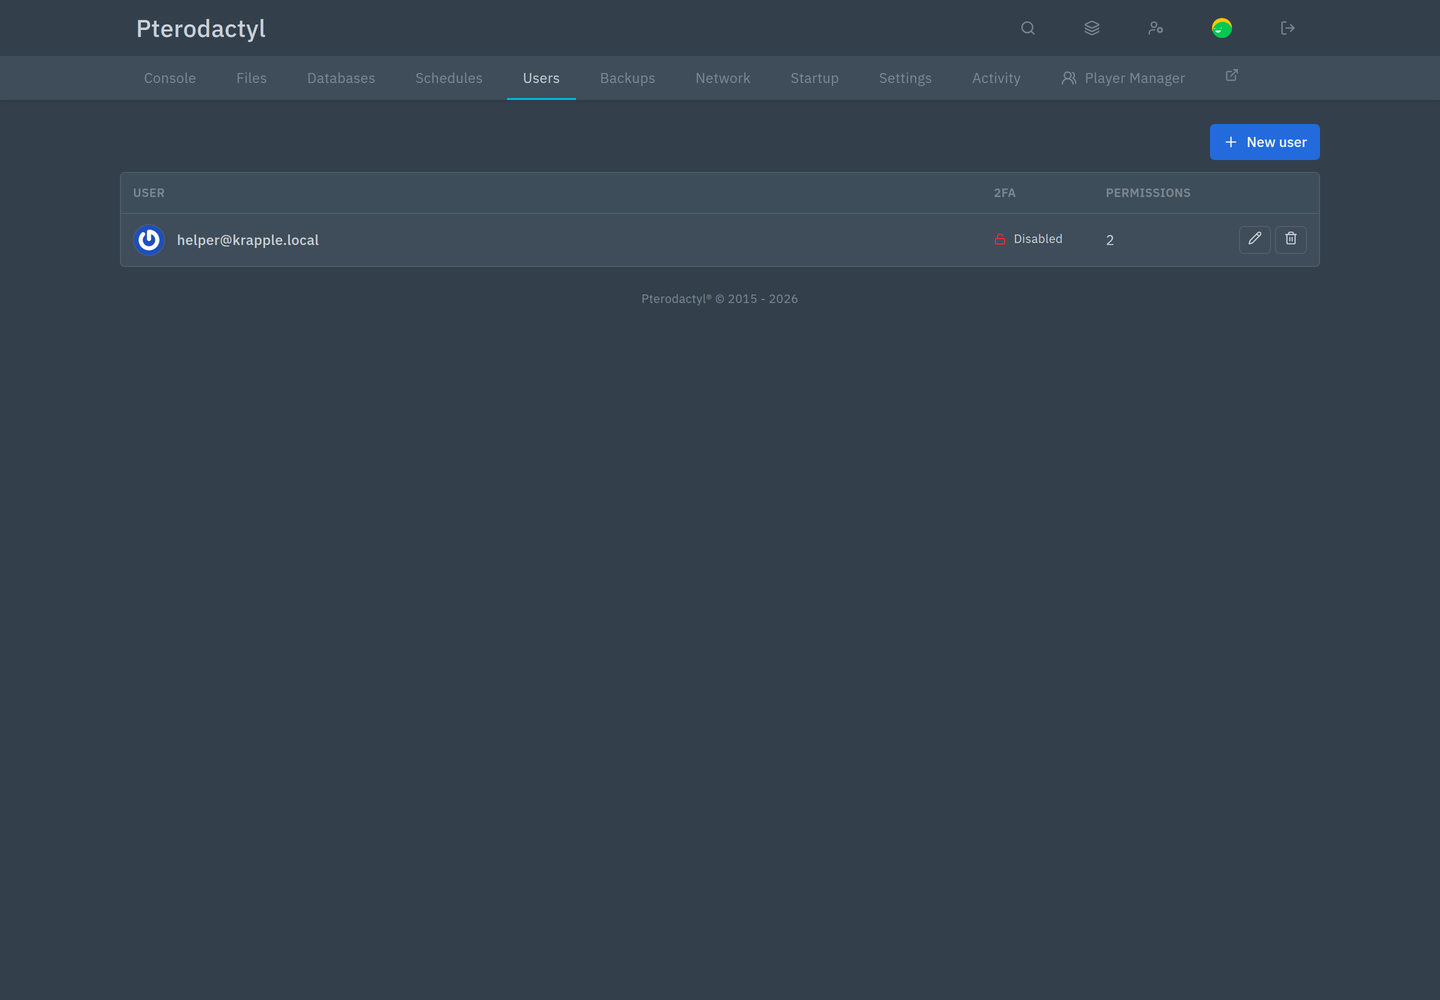
Open the server's Users page and tick only the permissions each person needs. There are seven: View, Moderate, Access, Gameplay, Server, History and Connection.
See Permissions for what each one allows and suggested roles.
Settings
Panel-wide settings are under Admin → Extensions → Player Manager → Settings. The defaults are safe: RCON set up automatically, restarts only when empty, a quiet console, and live inventories. See Settings before changing anything.
Installing by hand instead of automatically
If you would rather not let Player Manager edit server.properties:
Turn off Set up RCON automatically in the admin settings.
In
server.properties, set:propertiesenable-rcon=true rcon.port=25575 rcon.password=choose-a-strong-passwordAdd
25575as an allocation on the server's Network page, or Docker will not open the port.Restart the server.
Player Manager will use those settings. If RCON is on another host or behind a proxy, enter the host, port and password under Connection settings; those override the file.
Updating and uninstalling
- To update, install the new
.pteroextwith Replace (or--replaceon the command line). Settings, per-server overrides and history are kept. See Updating. - To uninstall, remove it from Admin → Extensions. Your Minecraft servers are not changed: RCON stays enabled, the allocation stays with the server, and the whitelist, operators and bans stay in the server's own files. See Updating for how to undo the RCON setup too.